BEFORE AND AFTER!
Lack of a scanner (or Photoshop) doesn't doom you to a greyscale portfolio. If you have a camera, you can digitise your images. If you have the internet, you can edit them.
Here is our original lineart image, shown side-by-side with each of our end results.
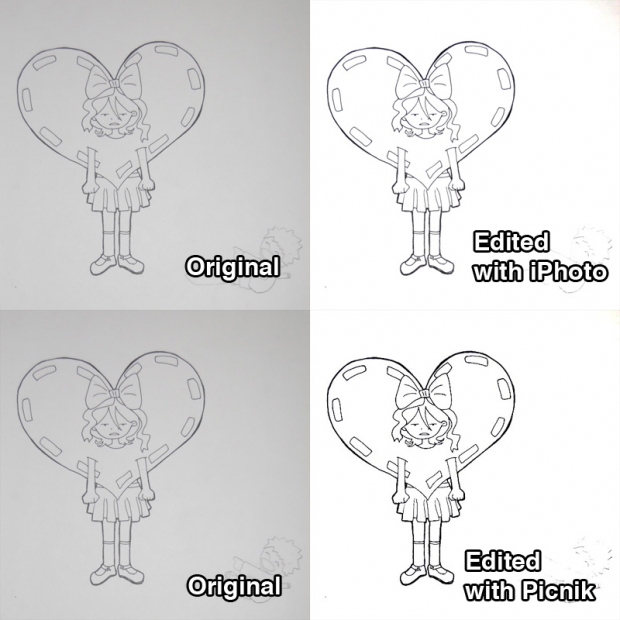
You can achieve the same results using either set of tools.
And here is our original colored image, also shown with the end products of editing.
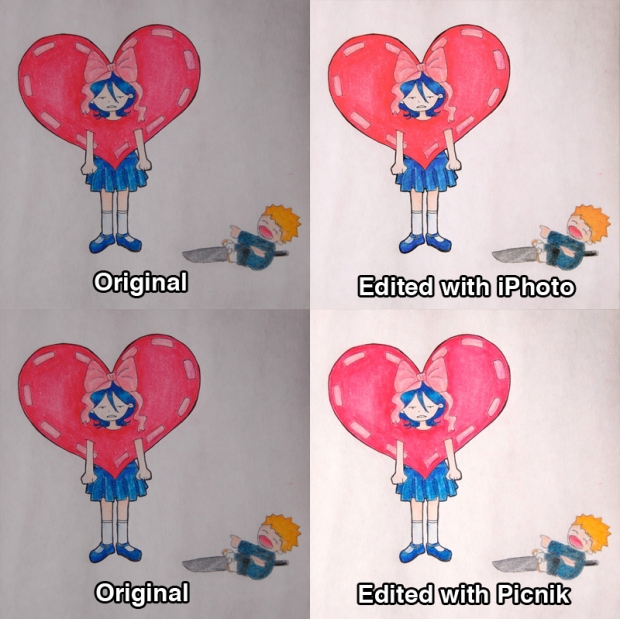
These "after" images aren't quite the same, but they both look better than the unedited version.
The core editing we did on each image was fairly simple. No Photoshop was used, or needed. (The things we did were so simple, in fact, that if you do have a scanner, you should be able to replicate all of them using the scanning software itself.)
And yet those small changes made a huge difference in how the fanart looks. Just lightening and brightening a picture can do a lot!
I see a lot of dark, blurry photographs in the fanart section. Hopefully some of those artists find this useful. (If you used the advice here to photograph or edit some of your artwork, please tell me what worked for you—and feel free to post a link to your artwork in the comments.)
Page One: Introduction.
Page Two: Prepare your artwork.
Page Three: Take the picture!
Page Four: Edit your lineart with iPhoto
Page Five: Edit your lineart with Picnik
Page Six: Edit your colored work with iPhoto
Page Seven: Edit your colored work with Picnik
Page Eight: Before and after! (You are here!)