STEP ONE: PREPARE YOUR ARTWORK.
If you're using a camera to digitise your artwork, the first thing you need to do is make sure that your drawing is ready to be photographed.
For black-and-white lineart, this means one important thing: ink your image.
Inking your drawing is a process that can mean a lot to your finished product. The benefits are twofold: Firstly, your lines will be clean—and secondly, your lines will be dark. Both will help your art look (and photograph) better.
At its core, inking is simple: trace the image using a black pen. Erase the underlying pencil. The more complicated the image, the longer it will take—but the more useful it will be. Be patient, and take the time to make it look good.
To see the difference between inked linework and pencil linework, compare Rukia (inked) and Ichigo (pencil only) in the example images. Inking makes a big difference!
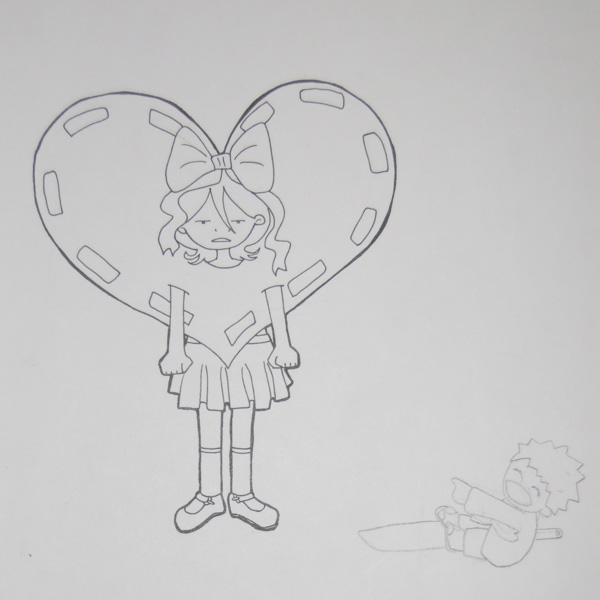
Even though Ichigo was drawn with firm, dark pencil lines, he's barely visible when compared to Rukia.
For greyscale and colored pencil images: If you wanted to ink your drawing, you probably did it before you started shading/coloring. You can skip this step, but make sure your image is cleaned up and ready to go.
Next step: Take the picture!
Page One: Introduction.
Page Two: Prepare your artwork. (You are here!)
Page Three: Take the picture!
Page Four: Edit your lineart with iPhoto
Page Five: Edit your lineart with Picnik
Page Six: Edit your colored work with iPhoto
Page Seven: Edit your colored work with Picnik
Page Eight: Before and after!