

Line Art (C) Rooen
Coloring & Tutorial (C) me
Medium: Photoshop
This is part one of the coloring tutorial.
Part two can be found here
Final result can be found here
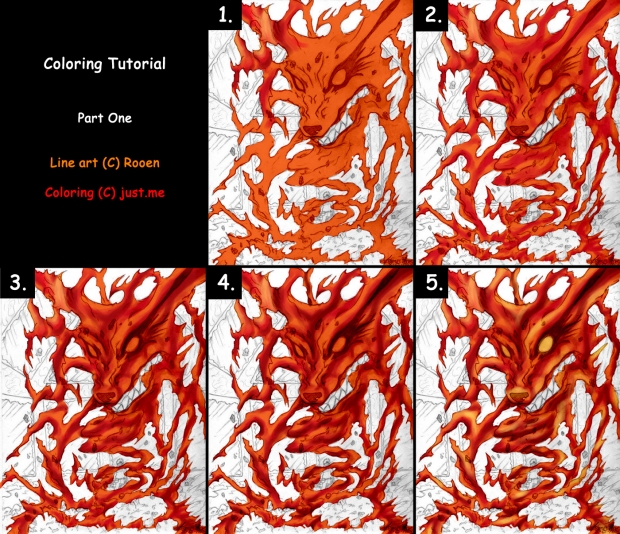
View High Resolution to see everything clearly! ;P As you can see, there are numbers in the corner, indicating the step. Here is some explanation of what I have done:
1.
- Open the line art
- Create a new layer and set it to 'linear burn'
- Roughly paint the area in a flat color with a brush of a hardness of 100% (on the new layer)
- Select your layer where you have added the flat color. Lock your layer with the transparency lock (the square on with white and grey squares in it). This way you can only color the area where you have already colored - the flat color. I do this because it saves a lot of erasing work because of all the edges of the colored area.
- Note: I have experimented with the coloring in the left top corner, to see if it would work out
2.
- Keep working on the same layer.
- Use an opacity sensitive brush (Airbrush Hard Round/Airbrush Pen Opacity Flow) and pick a darker color and start shading.
- Vary your brush sizes where needed - for example: I used a smaller brush at the bottom.
3.
- Pick a darker color and start shading the same brush - the opacity sensitive brush.
4.
- Repeat step 3 but use a smaller brush size - otherwise you will overlap too much of the previous shades.
5.
- Use a lighter color than the flat color you used in the beginning and start coloring the lighter areas. I used yellow in my drawing.
- Note: I also colored the eyes yellow.


