

Introduction
With Halloween coming up, I dusted off my theatre make-up skills, and my effects make-up kit, to put together a simple "how-to" guide for creating a basic bruise make-up effect.
Stats:
Difficulty Level: 2
Time to Complete: 15-30 Min
Supplies
- White cream make-up (cheap clown palette with white will work fine).
- Navy blue (or similar shade) eye shadow powder.
- Red blush powder.
- Meduim pink blush powder.
- Light pink blush powder.
- Make-up brush set (cheap dollar store set is fine) for eye shadow brush and cheek brush.
- Mirror
Process:
Before applying make-up, fluff the cheek brush (push it into your hand to spread the bristles). Make sure the area being made up is clean. If there are concerns about allergies to something that might be in the make-up, it's a good idea to do a small test application and not try to use the product if there is an allergic reaction.
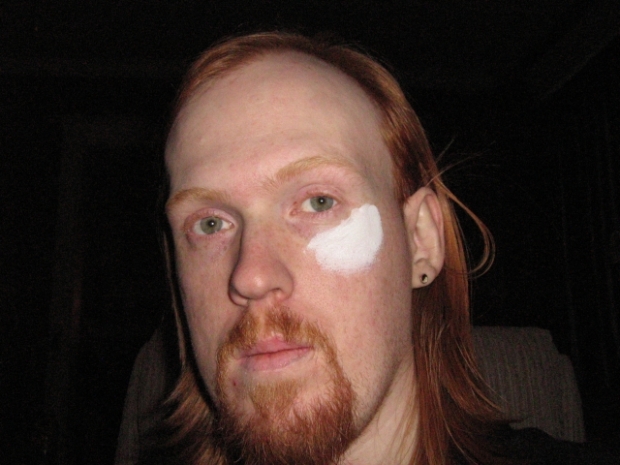
Step 1:
After choosing the location of the bruise, I chose under my eye, apply the white cream make-up in a lopsided oval covering the whole area you want to be bruised. This is the base that will guide the application of the other materials. I use my pinky finger to apply this coat, but a make-up sponge can be used as well if being messy is a concern.
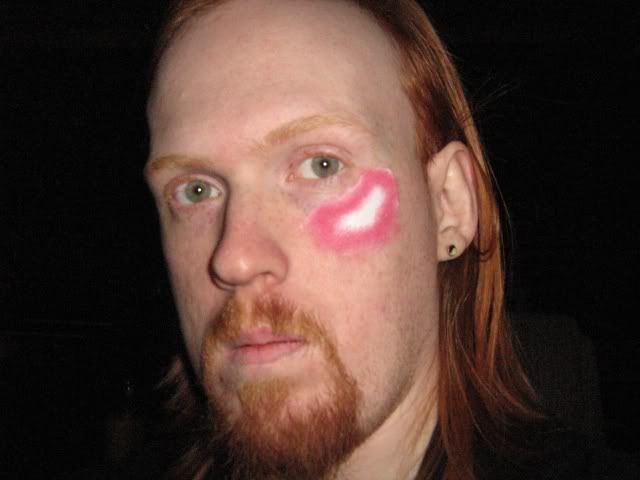
Step 2:
Take the eye brush and load it with the red blush powder. Dabbing lightly, apply the red to the edge of the white base, but try to keep a spot in the center of the white exposed. If you get a little color in the center, don't worry about it. The white spot will serve as a highlight in the finished bruise. What that means is the bruise will have the appearance of being slightly swollen when seen from a short distance. A little bit of color getting in there now doesn't harm the end product, sometimes it actually helps it look more real.
Step 3:
Clear the eye shadow brush then load it with the navy eye shadow. Apply directly on top of the red that was just applied, again trying to keep some of the white showing, and like before, don't worry if a little color gets in there.
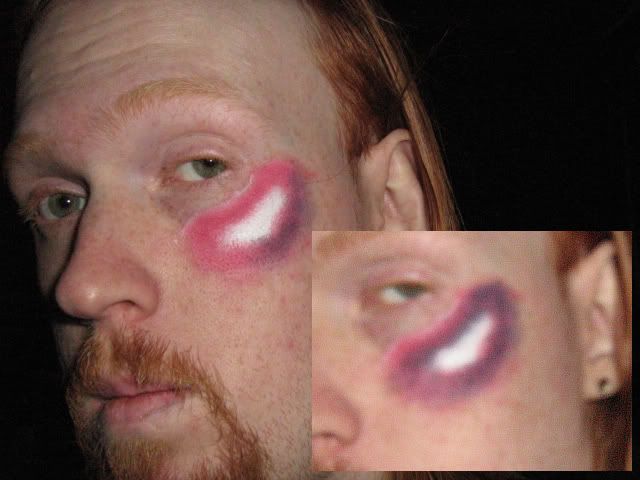
The larger picture show partly applied blue, the inset shows the completed step.
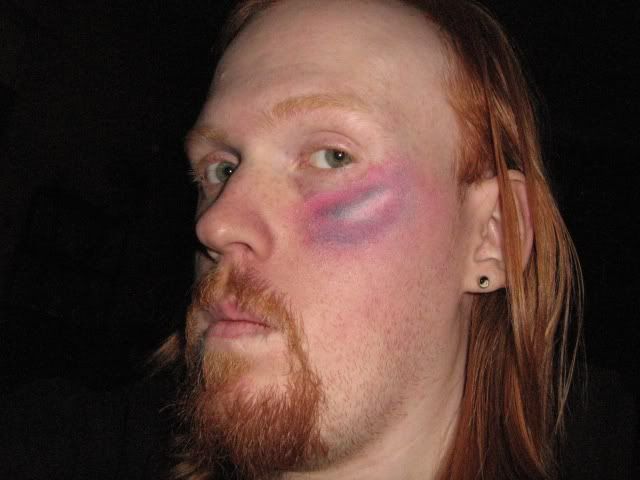
Step 4:
Clear the brush and load it with the medium pink blush powder. Working from the outer edge of the purple, apply the medium pink all the way around the bruise, blending it out.

Step 5
Load the cheek brush with the light pink blush powder, lightly dust the entire application (including the white area) and blend out the edges. There you have a basic bruise.
Notes:
If applying near the eye, be careful, the pigments can scratch the eyes if they get in there.
Experiment with applying the red and blue to change how old the bruise looks, and severity of the bruise, the deeper purple the bruise, the fresher or more severe it seems.
Adding greens and yellows (and using less blue) will age the bruise beyond "several days" to something a week or more old.

